NEW Sony Lamp XL-2400 ( Sealed replacement lamp for televisions, SMALL & SEALED ). Compatible Part Numbers: XL-2400, XL2400, XL-2400U, XL2400U, XL-2400E, XL2400E, F93087500, F-930-8750-0, A1129776A, A-112-9776-A
For Part Number: Sony Lamp XL-2400 ( Sealed replacement lamp for televisions, SMALL & SEALED ).
Compatible Part Numbers: XL-2400, XL2400, XL-2400U, XL2400U, XL-2400E, XL2400E, F93087500, F-930-8750-0, A1129776A, A-112-9776-A
For Enclosure: Sony Lamp ( XL-100 / 2-590-738 ).
Television Type: 3LCD.
For Bulb: UHP120 / 100w 1.0 E 19.8
Philips UHP120 / 100w 1.0
E 19.8 1.0 Philips.
Compatible TV Models: XL-2400U, XL-2400E, XL-2400J, XL-2400C, XL2400U, XL2400E, XL2400J, XL2400C, A1129776A, A-1129-776A, A-1129-776-A, A1129-776A
Assembly part numbers: 2930238, AM0000109.
Tools Required: Standard Philips or Flathead screwdrivers, Pair of Pliers, A new lamp.
Time Required: About 15 minutes.
Abstract: This guide is being published to show how easy it is to replace your original Sony XL-2400 Lamp.
NOTE: The bulb should be handled with a clean lint-free cloth at all times to avoid any dirt or oil. Our hands are naturally oily…The oil residue from our hands can cause premature failure of the lamp if the front side of the lamp is not wiped down after the installation. It doesn’t hurt to do a final wipe with a clean, non-abrasive, lint-free cloth before reinstalling your lamp…
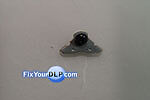
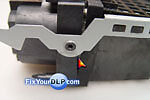
1.-Start by removing the black screw on the side of the metal cage.
2.-Next, remove the ones holding the metal securing extensions in place.
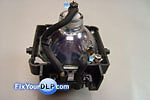
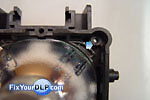
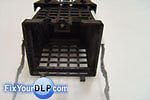
3.-Now separate the high temperature plastic base with de bulb attached from the rest of the enclosure.
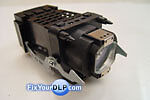
4.-This is what it looks like when successfully retrieved.
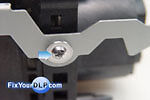
5.-On two of the four corners you’ll find a metal clip like this one, holding the lamp in place.
6.-Take it out and slip the bulb out from the corner you unscrew the clip.
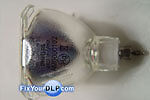
7.-Now take out your new Philips Bulb so you can replace the old one. Be extra careful when handling the bulb, it’s very fragile.
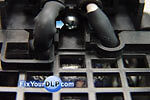
8.-Insert the new bulb back, and make sure the cables are connected securely and in the right place on the base.
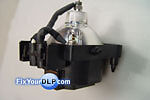
9.-Grab the rest of the enclosure and install in back on to the bulb, but don't forget to place the security.
10.-Reinsert the black screw to hold the enclosure back together.
11.-Finally place the last two to hold the metal extensions and make sure it doesn’t move.
12.-Congratulations, now you’re finished.
IMPORTANT: After installing the replacement bulb, you should wipe it with a clean cloth to avoid any dirt or oil. Our hands are naturally oily…this could reduce considerably the life span of the new lamp.
